
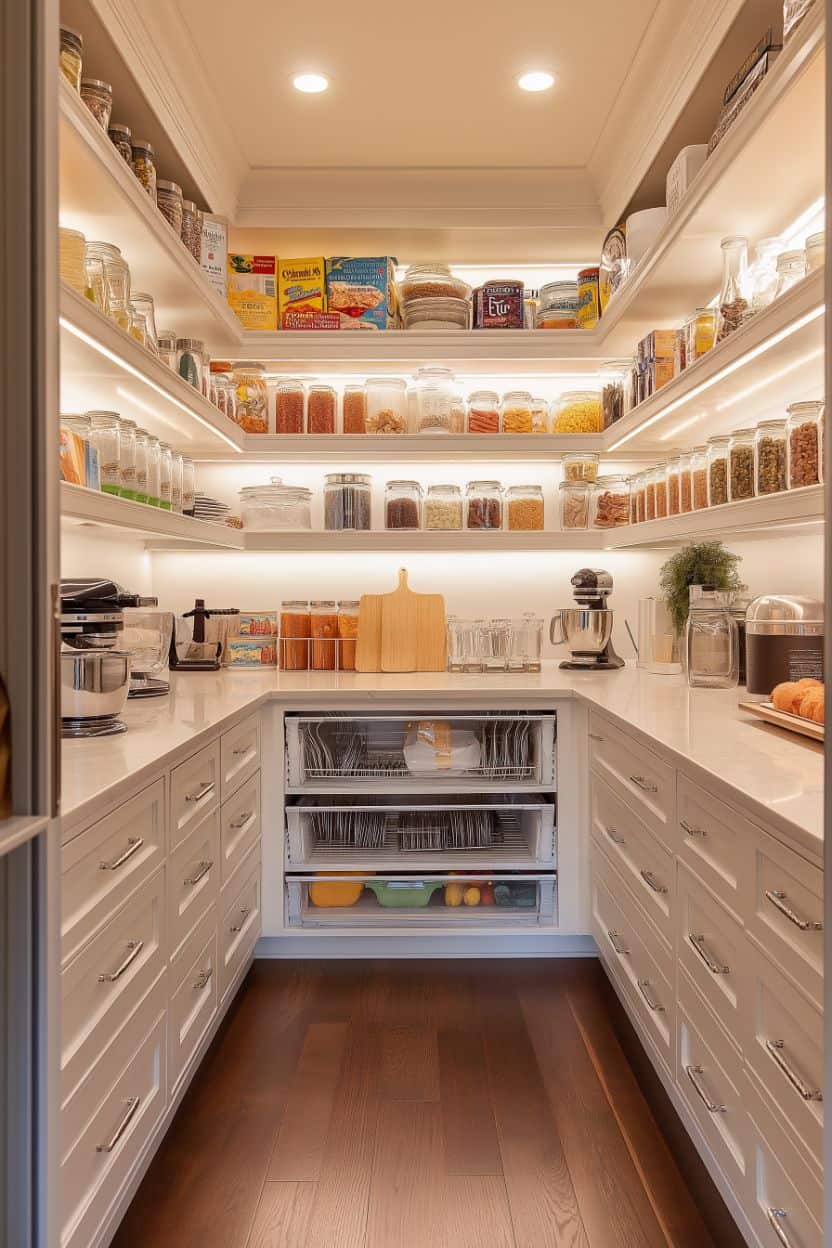

A well-designed pantry serves as the operational engine of a functional kitchen. When properly structured, a pantry reduces meal preparation times, minimizes food waste, lowers grocery costs by preventing duplicate purchases, and eliminates everyday household friction. Whether working with a spacious walk-in pantry, a narrow reach-in cabinet, or pull-out tall units, applying intentional layout principles turns chaotic food storage into an intuitive, efficient system.
Understanding Your Pantry Space and Inventory
Before purchasing containers or rearranging shelves, a comprehensive assessment of both physical dimensions and household consumption habits is required. Physical layout constraints dictate what types of storage hardware will yield the highest return on usability.
Begin by measuring the height, width, and depth of every shelf. Pay close attention to vertical clearance between shelves, as fixed shelving requires precise container sizing, whereas adjustable track systems allow ongoing modification. Note potential obstacles such as door swing radiuses, interior light fixtures, floor vents, or protruding baseboards that could hinder pull-out drawers or door-mounted racks.
Next, evaluate your household inventory needs. Track the volume and dimensions of items regularly purchased. A family that buys grains, canned goods, and paper products in bulk requires significantly different spatial planning than a household that shops daily for fresh ingredients with minimal dry goods stock. Group your inventory into logical usage categories to estimate the square footage needed for each product type.
Essential Layout Zones for Maximum Efficiency
An optimized layout relies on ergonomics and visibility. By assigning specific vertical zones based on physical reach and frequency of use, items remain effortless to locate and put away.
Prime Real Estate Zone (Eye Level to Waist Level)
The area spanning from waist height to eye level represents the most accessible region in any pantry. Reserved strictly for daily essentials, this zone should house frequently used ingredients, breakfast supplies, daily snacks, dinner staples, and cooking oils. Placing high-rotation items here reduces unnecessary bending, reaching, and shelf searching during busy meal preparation windows.
Lower Shelving Zone (Waist Level to Knee Level)
Lower shelves are best suited for heavier goods and high-volume staples. Store extra cans, multi-pack beverage cartons, heavy bags of flour or sugar, and less frequently used small kitchen appliances such as pressure cookers or stand mixers in this area. Placing dense items lower prevents physical strain when lifting and eliminates the hazard of heavy objects falling from upper shelves.
Floor Level Zone
The floor space underneath the bottom shelf provides an ideal location for bulk items, recycling receptacles, or large rolling storage bins. Bins mounted on casters work exceptionally well at floor level for storing heavy bags of pet food, root vegetables like potatoes and onions in breathable baskets, or paper towel backstock. Keep items off the raw floor surface by using low carts or slatted risers to maintain clean hygiene standards.
Upper Shelving Zone (Eye Level to Ceiling)
The highest reaches of the pantry should store lightweight, infrequently used, or seasonal items. Oversized serving platters, holiday decor, specialty baking molds, extra paper goods, and backstock items like surplus cereal boxes belong on top shelves. Store items in clear, lidded bins with prominent labels to ensure contents are easily identified from below.
Vertical Door Zone
In reach-in and walk-in pantries with swing doors, the interior door face offers valuable storage real estate. Installing shallow wire or wooden door racks creates an efficient home for small items that easily get lost on deep shelves, such as spice jars, condiment bottles, foil rolls, or packet mixes. Ensure the door rack depth does not collide with interior shelf fronts when closed.
Categorization Strategies That Simplify Kitchen Workflow
Effective organization depends entirely on grouping items logically by utility rather than manufacturer or package shape. Creating distinct sub-zones within your main shelves ensures every item has a dedicated, predictable home.
-
Baking Essentials: Group flour, sugar, baking soda, yeast, cocoa powder, extracts, and food colorings together in one dedicated sector.
-
Breakfast and Morning Routine: Place oats, breakfast cereals, syrups, pancake mixes, coffee beans, tea boxes, and breakfast spreads in close proximity.
-
Grains, Pasta, and Beans: Dedicate a section to rice varieties, quinoa, dry pasta shapes, noodles, canned beans, and dry legumes.
-
Canned Goods and Sauces: Organize canned vegetables, soups, tomatoes, pasta sauces, and broths using tiered risers for maximum rear-shelf visibility.
-
Snack Station: Separate healthy daily snacks from specialty treats. Use open-top bins for individual chip bags, granolas, bars, and dried fruit to streamline school lunch packing and daily snacking.
-
Oils, Vinegars, and Dressings: Reserve a spill-resistant surface or turntable near cooking supplies for liquid condiments, cooking sprays, and specialty vinegars.
Container Selection and Hardware Optimization
Using the right containment strategy prevents visual clutter and maximizes shelf volume. Decanting food items into uniform containers is not merely an aesthetic choice; it extends shelf life, guards against household pests, and eliminates wasted volume caused by half-empty cardboard boxes.
Clear Decanting Canisters
Airtight glass or BPA-free plastic canisters are essential for dry staples like rice, flour, pasta, cereal, and sugar. Uniform square or rectangular canisters stack efficiently, eliminating the dead space that round jars often create. Clear walls provide immediate visual cues regarding current inventory levels, preventing unexpected shortages.
Turntables and Lazy Susans
Deep corner shelves and hard-to-reach cabinet spaces frequently become dead zones where items are forgotten and expire. Single or two-tiered turntables solve this problem by bringing items from the back to the front with a simple spin. They are particularly effective for spices, oil bottles, condiment jars, and small baking containers.
Tiered Shelf Risers
Canned items placed on flat shelves often hide behind one another, making it difficult to assess stock. Three-tiered expandable risers elevate back rows above front rows, instantly granting line-of-sight visibility for every canned good without rearranging items.
Open-Top Wire and Solid Baskets
Individual small packages, snack bars, squeeze pouches, and produce bags tend to spill across flat shelves. Open-top wire, woven, or plastic baskets act as drawers, allowing you to pull out an entire collection of items at once to browse contents cleanly. Solid-bottom or lined baskets prevent crumbs and small debris from sifting down to lower shelves.
Long-Term Maintenance and FIFO Systems
Maintaining a structured pantry requires sustainable habits and periodic reviews. Incorporating commercial inventory management practices prevents food waste and maintains order long after the initial setup.
Implement the First-In, First-Out (FIFO) method when putting away fresh groceries. Place newly purchased items behind older inventory on the shelf. This practice ensures that older stock is consumed before reaching its expiration date.
Schedule quarterly inventory checkups coinciding with seasonal shifts. Clear out expired products, wipe down shelf surfaces, wipe off decanted canisters, and re-evaluate bin assignments based on changing household eating patterns. A full system reset takes minimal time when structural organization is already in place.
Step-by-Step Implementation Strategy
-
Complete De-cluttering: Completely empty the pantry. Place every item on clean kitchen countertops or tables to view total inventory volume simultaneously.
-
Sort and Purge: Group items into categories and discard expired products, stale goods, and items your household will not consume. Unopened, non-perishable items that are still fresh can be donated to local food banks.
-
Deep Clean: Wipe down all interior walls, shelf surfaces, brackets, and floors with a mild cleaning solution to remove dust, crumbs, and residue before reintroducing inventory.
-
Adjust Shelving Heights: Reconfigure shelf spacing based on the physical heights of your decanted containers, baskets, appliance heights, and tiered risers.
-
Decant and Label: Transfer high-rotation dry goods into airtight containers. Attach clear labels with product names and expiration or preparation details.
-
Assign Zones and Reload: Place categorizations back into assigned physical zones based on ergonomics, placing daily essentials at eye level and heavy items down low.
Frequently Asked Questions
How do you prevent grain pests from invading decanted food items?
Preventing grain pests like pantry moths and flour beetles requires storing dry goods such as flour, grains, cereals, and nuts in airtight glass or thick hard-plastic canisters equipped with silicone seals. Paper or thin cardboard packaging from grocery stores allows insect larvae to penetrate easily. When bringing new bulk grains home, freezing them for 48 hours kills potential unhatched eggs before products enter your primary storage bins. Cleaning shelf surfaces regularly to eliminate stray crumbs and flour dust also discourages pests from establishing nests.
What is the ideal shelf depth to prevent losing items at the back?
The ideal shelf depth for a standard residential pantry ranges between 12 and 14 inches. This depth allows standard box and container sizes to fit comfortably while keeping every item within easy reach and clear visual range. Deep shelves measuring 18 to 24 inches often cause items in the back to be forgotten, resulting in expired stock. If you must work with deeper shelves, utilize full-extension pull-out drawers, slide-out wire baskets, or deep clear bins that function as removable drawers to maintain easy access to rear items.
How can renters organize deep pantries without altering cabinetry permanently?
Renters can optimize deep or awkward pantries by utilizing non-permanent modular accessories that require no drilling. Clear acrylic bins with built-in handles turn deep fixed shelves into functional pull-out drawers. Tension rods installed vertically can create dividers for baking sheets and cutting boards. Stacking shelf inserts double vertical storage capacity, while over-the-door hanging wire baskets hang securely over cabinet doors using soft padded hooks. Command strips with hook-and-loop fasteners allow heavy labeling or light accessory hanging without damaging paint or wood finishes.
What is the best method for storing liquid oils and vinegars without damaging shelf surfaces?
Store liquid cooking oils, vinegars, and viscous sauces on a non-porous, raised-lip turntable or inside a washable acrylic bin. Oil bottles frequently develop drips down their sides that penetrate wood shelves, stain laminate, or stick to wire racks. Utilizing a hard plastic or rimmed tray catches drips before they contact shelving. Adding a washable silicone shelf liner directly underneath these liquid storage containers provides an additional layer of protection against accidental spills and makes cleanups straightforward.
How do you adapt pantry organization for young children or family members with mobility limits?
To adapt a pantry for children or individuals with mobility constraints, place age-appropriate, safe items within lower vertical zones between knee and chest height relative to the user. For children, create low-level snack baskets containing healthy options, pre-portioned dry snacks, and juice boxes so they can self-serve without climbing on counter edges or chairs. For family members using mobility devices, utilize pull-down upper shelf mechanisms, lower roll-out baskets with smooth ball-bearing glides, and oversized label typography with high-contrast print or visual icon indicators.
What environmental temperature and humidity conditions are necessary for long-term dry food storage?
Dry foods preserve maximum nutritional value and fresh quality when stored in a cool, dark, and dry environment. The ideal temperature range for pantry storage is between 50 degrees and 70 degrees Fahrenheit. High temperatures accelerate product spoilage and spoil oils, while elevated ambient humidity promotes mold growth and clumps powdered goods. Avoid placing pantries near heat-generating appliances like dishwashers, ovens, or refrigerators, and keep food out of direct sunlight coming through adjacent kitchen windows.
How do you store non-food paper products alongside dry goods in a compact pantry?
In compact pantries where non-food items must share space with food inventory, maintain strict physical separation to preserve hygiene standards. Dedicate the absolute top shelf or floor level storage bins exclusively to paper towels, napkins, parchment paper, and food storage bags. Never store chemical cleaning sprays, detergents, or scented paper goods on shelves directly above or alongside unsealed food packages, as chemical vapors and strong fragrances can permeate porous food packings over time.

Comments are closed.